skip to main |
skip to sidebar
Feature a Friend Friday at Broken Treasures
So I am just tickled pink to be the first friend featured on Elizabeth's blog Broken Treasures... Every Friday for the summer she will be featuring a friend on her blog. How exciting is that!!!
Here we go.....
I wanted to share a technique with you that I just love and that would be are shaker boxes.... I have two different ones to show you....
First one is used in this layout and is super easy....
I used the packaging from a package of Basic Grey Brads.... what is important here is to add a little water on the edge that you are going to glue down to the layout.... that way you can easily rub away any paper that is still glued on their from the original packaging.
Second we will learn how to make another kind of shaker box... which I made for this layout....
First of all you need to decide what you shape and theme of your box... this works great with diecuts from a machine... but since we dont all have a diecut machine I decided that I would show how to free hand make one.
Second you need to figure out what to use for foam... I have tried the following....
Pre-made cut foam frames that have adhesive on both sides- Pictured on the left (you are confined to their shapes and sizes)
Foam tape cut and placed around the edge- cant use small beads or glitter because they can come out... and you do not have a smooth edge from the side
Cardboard- Works but then you see the cardboard from the side
Kid Craft Foam- Works the best and you can get it in a ton of different colors.... I love to use white because you can color any color you would like....and white usually looks best against the images in the shaker box-Pictured on the right
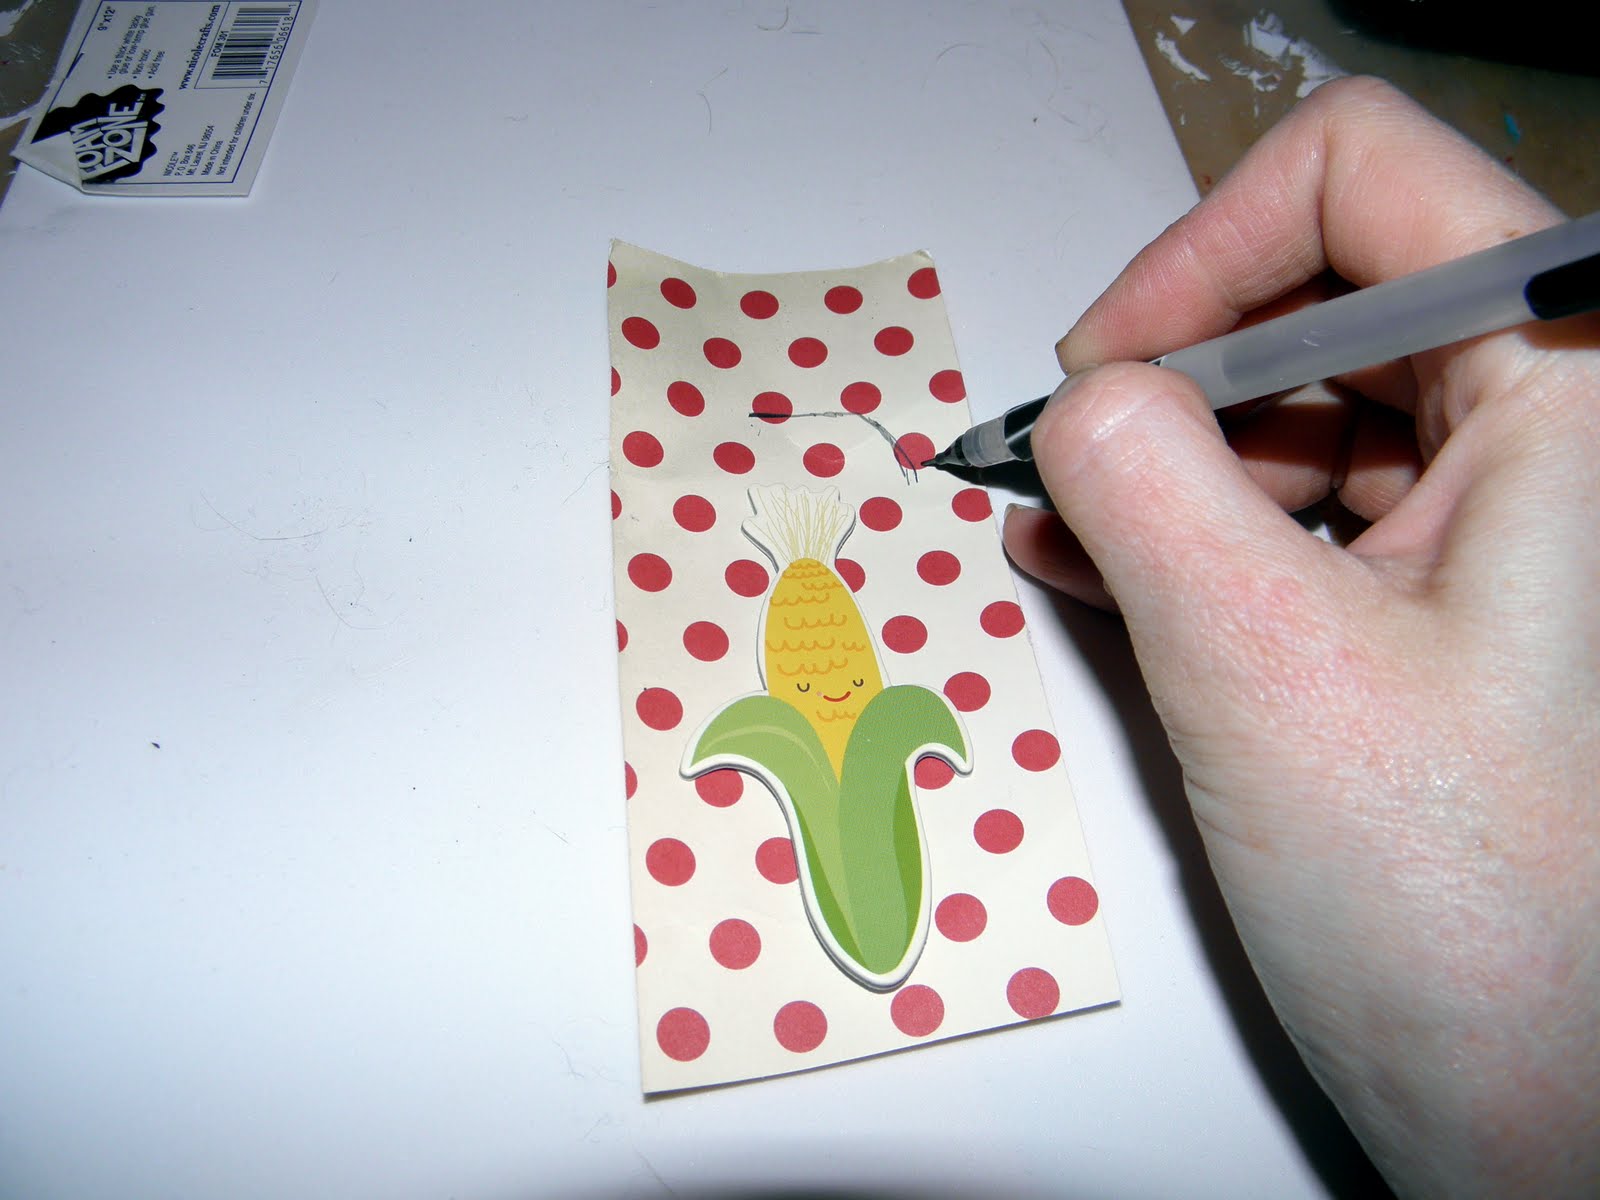
Next you cut out the background... if you are using a diecut just trace the diecut onto the background paper.... or you can free draw it like I did around the corn that I knew I wanted inside my shakerbox
Now you will want to cut it out of the background paper and trace it onto to the foam and then cut the foam out
You will need to cut out the inside area of the foam so I just drew1/4" on the inside all the ways around... it doesnt have to be perfect... you dont have to measure or anything just eyeball it.... then cut it out. Now we have the foam and the background. Next we want to make the clear cover... what I think is the best is to use plastic from packaging... it is thick and completely clear. You can also use transparencies or even plastic bag packaging but once again these are not as firm as the other plastic. You can see the packaging I used below
You can trace your shape onto the plastic using your background... if you are really good you can hold the background on the plastic and cut around it... now you should have the background, foam and clear cover.
Next you need to make the frame that goes on top... this needs to be cut the most precise because this what you will actually see. You are going to take your background and flip it over and trace it onto the backside of the paper you want to use for the frame... we are working on the backside of the frame because we dont want any of our pencil marks to show. The shape you just traced will not actually be your cut lines... at this point you need to draw the cut lines about 1/8" wider that the background shape.... so that in the end the frame is larger than the background, foam and clear cover.
Cut it out... then you are going to have do like you did with the foam and cut the inner area. Draw your cut lines about 1/4" or slightly more from the edge remember to continue to work on the backside so that you dont see your pencil marks... cut it out
Now we have all our parts so we need to start putting them together... first glue the foam to the background.
Next fill it with the things that you want inside your shaker box... this can be chipboard, beads, buttons, glitter, mica. pretty much whatever you would like.... remember not to fill it too full... if you want to put thicker things you can go go back and cut another layer of foam. Glue the frame to the clear cover and cut away any of the clear cover that hangs out....
Glue the top and the bottom together making sure that none of the beads, etc are in between.... You can take a marker and color around the edge if you would like it to match your frame or just leave it white...
You are done.... your finish project should look something like this.... I have seen all kinds of cute shakers... ice cream cones are really cute as well as even title for layouts... the sky is the limit!
I would love to hear what you think about shaker boxes and I definitely want to see what you create with them so feel free to stop by my blog anytime!!!!! http://scrapmethis.blogspot.com


What a cute idea! I would love to fill one of these with glitter!
ReplyDelete